Secret Squirrel Brownie Recipe

Look, I know what it’s like when you go on a recipe website these days; you just want a recipe for brownies and you’re faced with a bunch of waffle first. I understand, it’s annoying. But 1) the search engines make us do it and 2) I devised this recipe for a reason, and I think it’s quite interesting! But, if you’re already thinking, “shut up, Elena, and give me that brownie recipe you promised, immediately!” there is a handy “jump to recipe” button above this paragraph.

If you’re even vaguely curious as to why I invented a brownie recipe, please do read on!

Recently I’ve been on a bit of a rollercoaster with my health. Long story short, my thyroid is borked. Never one to sit on my butt and just wait for things to happen on their own, I’ve been doing a bit of reading about how to boost thyroid health with nutrition. Unfortunately for me, a lot of my favourite foods are off the menu (broccoli! Potatoes! Brussels sprouts!) and a lot of things I’m not that fond of could do me a power of good. Namely, nuts and seeds.

I may be a fully-grown, taxpaying, child-rearing human being but when it comes to eating food I dislike I am basically a dog: I need to hide it in other food. When I was having fertility treatment I had to be quite careful what I ate (the drugs I was on can induce IBS-like symptoms if you’re not careful) so I was really specific about eating small, regular meals through the day and making sure the nutrition was well-balanced. I have PCOS and that can come with insulin-resistance, and balancing my blood sugar was, apparently, key to conceiving and sustaining a pregnancy. So, I started making overnight oats with added buckwheat, for fibre and quinoa, for protein. As an added protein, fibre, vitamin and mineral boost I also added a mix of milled nuts and seeds. For me, as a nut-and-seed hater, the flavour was barely perceptible and it meant I had a nutritionally-balanced breakfast to start the day with.

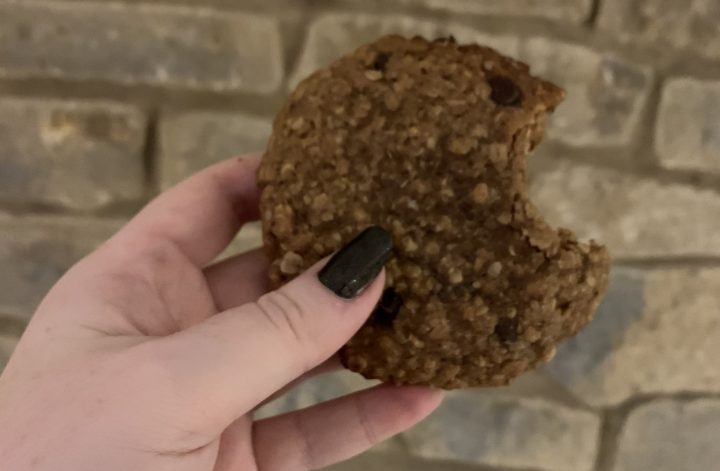
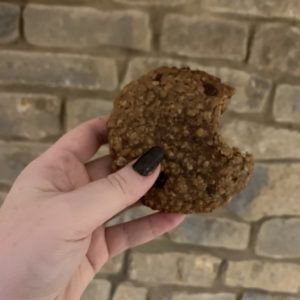
As the mum to a now eight-month-old baby, I am always on the lookout for snacks that I actually want to eat, are portable, room-temperature stable, batch-cooked and easy to eat with one hand. For a while 50% of my diet was lactation cookies, but now I wanted to come up with a thyroid-boosting snack that I could have when I was flagging and which might give my poor tired metabolism a little bit of help. Enter, the Secret Squirrel Brownie.

Now, I think it’s important to make a distinction here. While I am trying to take care of my physical health with food, I think it’s only fair that I mention I also have a history of eating disorders. I know how dangerous and unhelpful it is to brand foods and “good” or “clean” or in any way try to assign moral value to food. So, let me be clear. These brownies taste great. I have made them to encourage myself to eat ingredients which could be beneficial my own physical health, but they are also good for the soul. I not a nutritionist or dietician, I’m not even a chef. I’m just trying to make nice food and share it with people on the internet. At the risk of stating the obvious, a brownie is not going to heal your body, and this recipe is no substitute for the advice of an actual doctor. I have no proof that these do anything at all for your physical health, but I can vouch for their tastiness. I’m here to bake, not to sell snake oil.

Oh, and in case there is any doubt, these are not suitable for nut allergy sufferers. (Unless you swap the peanut butter for normal butter and swap out the ground nuts and seeds for 55g plain flour, in which case fill your boots!)

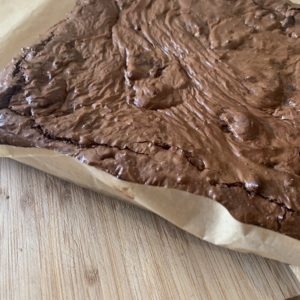
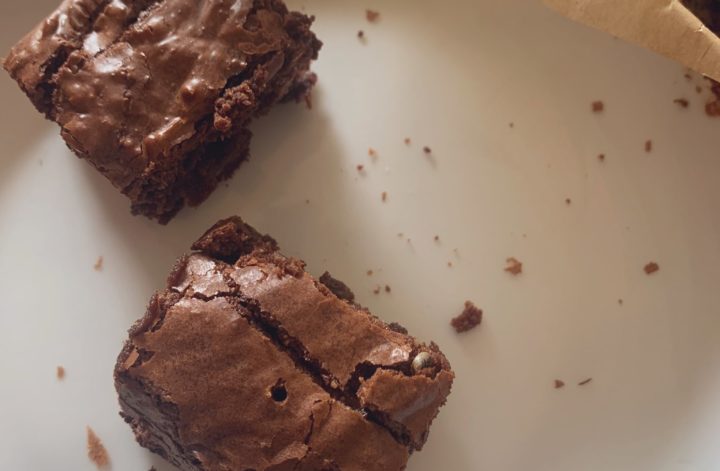
Elena’s Secret Squirrel Brownies

Elena Bjørn
If you're looking for a brownie that's higher-than-usual in protein, lower-in-than-usual in fat and has loads of omegas, B vitamins and fibre then this is the recipe for you. That said, if you're just looking for a really tasty brownie this will still absolutely do the trick.
Prep Time 30 minutes
Course Dessert, Snack
Cuisine American
Servings 36 brownies
Calories 141 kcal

Equipment

  • 24cm square baking tin
  • Greaseproof paper
  • Electric mixer
  • Mixing bowls
  • Moulinette or blender

Ingredients
  

  • 60 g peanut butter I used smooth, you can use whatever you like. Almond butter would also work.
  • 50 g unsalted butter You could use coconut oil if preferred.
  • 245 g dark chocolate Around 70% cocoa is great, much higher will result in dry, bitter brownies.
  • 65 g white chocolate
  • 65 g milk chocolate
  • 60 g plain flour To make these gluten-free you can swap this for 55g more ground almonds.
  • 50 g finely-ground nuts and seeds I used a mix of linseed, flaxseed, pumpkin seed, sunflower seed, hemp seed, almonds, walnuts, hazelnuts, cashews and Brazil nuts, milled in a moulinette until relatively fine. Good old shop-bought ground almonds would be perfectly fine, though!
  • 65 g cocoa powder
  • 4 large eggs
  • 360 g golden caster sugar
  • 1 tsp vanilla paste Extract would be fine.
  • 2 tbsp brewer's yeast (debittered) This can be omitted without affecting the recipe at all.

Instructions
 

  • Preheat your oven to 180°c/160°c fan and line your baking tin with greaseproof paper.
  • Measure out your peanut butter, unsalted butter and dark chocolate into a bowl and melt gently in a bain marie. Alternatively, you can melt it carefully using the microwave on low power in 40 second increments until the chocolate is melted. Mix until uniform in colour and texture, and put aside to cool slightly.
  • Mix your eggs and sugar with your hand mixer, or use a stand mixer with the whisk attachment, on high. You want the mixture to roughly double in volume and be very pale and fluffy. This could take 3-8 minutes depending on your mixer's speed.
  • Once the egg and sugar mix is voluminous enough, gently fold in the chocolate/butter/peanut butter, plus your vanilla paste or extract. Use figure-of-eight motions, taking care not to knock out too much air, until fairly well combined. Don't worry about making it completely uniform for now.
  • Whisk your ground nuts and seeds, flour (if using), brewer's yeast and cocoa powder together in a bowl briskly until all lumps are gone and the ingredients are evenly dispersed. Add in your white and milk chocolate, chopped into chunks (I like a variety of sizes, just for texture.) Fold the dry ingredients into the wet mixture gently until no dry streaks remain.
  • Pour your brownie batter into the lined baking tin, spreading evenly if necessary.
  • Bake for 25-35 minutes, depending on how you like your brownies. Slightly longer will yield a more fudgy/chewy brownie, while less cooking time will give you more of a dessert-style gooey brownie. To check that your brownies are cooked, give your pan a little shake. If any of the batter is still wobbly it needs a little longer.
  • As difficult as it may be, leave your brownies to cool completely before slicing. This will give you much tidier pieces. Make 6 slices in each direction to yield 36 squares. This is the serving size I'd technically recommend in one go but let your heart guide you. I'd be lying if I said I only ever had one at a time.
  • Serve with tea or coffee, or with a scoop of ice cream if you're feeling decadent (as you should!)

Notes

You could make this recipe egg-free by substituting the eggs with 1tbsp milled flax seeds hydrated in 3tbsps of warm water and one very ripe medium-sized banana thoroughly mashed, plus a tsp baking powder to compensate for the loss of volume from the eggs.
You could also try swapping the butter for dairy-free spread and the chocolate for vegan chocolate to make it dairy-free (and combine it with the above swaps to make these brownies vegan) but as I haven’t tried this myself I can’t say how well this would work. If you do try it, I’d love to hear from you! I wouldn’t recommend using all peanut-butter, as the batter is already fairly thick and I think this would likely make it far too stodgy, if you could even mix it at all.
You could also experiment with different nut butters, ground nuts and add-ins. I know my mum would like to to throw in some whole pecans, but for me this recipe is about hiding the nuts and seeds in plain sight. 
I am certainly not trying to pretend these brownies are a “health food”. I am not remotely qualified to do so, and I also don’t want to participate in the perpetuation of diet culture. They just happen to be delicious brownies that cunningly disguise some ingredients that are beneficial to most people’s nutrition without being particularly perceptible to the palate. 
Keyword baking, beginner, brownie, cake, chocolate, health benefits, thyroid
Continue Reading

Oatmeal Chocolate Chip Lactation Cookies

a lactation cookie held in the air in front of a rustic brick wall

Yeah, you heard me right. Lactation cookies.

If you’re looking for a super tasty, chewy, oaty chocolate chip cookie then you can scroll by and ignore the whole lactation thing. You can even leave out the brewer’s yeast and flax seeds if you don’t fancy tracking them down, though they do have other alleged health benefits, which I’ll expand on a little below, and don’t affect the taste. Don’t worry, you won’t find boob milk on the list of ingredients.

What are lactation cookies?

Put simply, they are cookies with ingredients to boost breastmilk supply.

I stumbled across the idea after my mum hounded me to drink Guinness to help get my boobs working a bit better after my son was born. Given my poor tolerance for alcohol and my even poorer tolerance for beery, stouty beverages I really wasn’t keen, but I was getting a bit desperate. I took to Google to try and find an alternative and the concept of “lactation cookies” came to my attention.

I read a lot of these recipes and, I’ll be honest, quite a few of them were a bit too health-foody for my liking. I want my cookies to taste like cookies, not hamster bedding. If I’m going to be reaching for a snack with a baby on my boob at 4am, it had better be worth the risk of getting crumbs on his head. So, I did my research into the ingredients to make sure I was including the key components, and endeavoured to create a lactation cookie anyone would enjoy, even if they aren’t sleep-deprived and slightly haggard.

a sheet of freshly-baked lactation cookies

What is in lactation cookies?

I did a fair bit of research on the topic and the common “active” ingredients were oats, flaxseed and brewer’s yeast. Each of these ingredients have (supposedly) beneficial properties, whether or not you’re lactating.

Brewer’s yeast has iron, potassium, selenium, zinc, protein, magnesium and B vitamins, as well as probiotics. I bought mine from Holland and Barrett in debittered powdered form, which worked really well. From what I’ve read online, it can be a bit unpleasant otherwise. I really couldn’t detect the flavour in the finished cookies.

Flax seeds are an ancient crop with a whole host of health benefits, including fibre, omega-3s and lignans, along with plenty of other vitamins and other nutrients. Most importantly, in this scenario, they contain phytoestrogens, which supposedly help breastmilk supply. I recommend using ground flax seeds wherever possible, as the husks on whole flax seeds make the interior kernel harder to digest. Plus, if you want to make this recipe vegan, you can use the flax seed to make an egg replacer to bind the cookie. More on that later…

Oats are another great iron source, which is why they appear in most recipes I’ve found for lactation cookies. They may also help to lower cholesterol and lower blood sugar.

There are other things you can throw in there, like chia seeds, and I sometimes do, but these three ingredients are the Big Daddies.

Do lactation cookies work?

I can only speak for myself, but for me the answer is a resounding “YES!”

I was adamant that I wanted to exclusively breastfeed, and I did my best. But, after a whole night of feeding with a still-hungry baby screaming at me and both boobs running dry, I accepted that I needed to add formula into the equation, pun half-intended. After that point I was increasingly desperate to find ways to get my supply up to meet my son’s requirements, and these haver certainly made a difference. Plus, breastfeeding is surprisingly hungry work, and having a semi-healthy snack to hand is essential.

Will lactation cookies make me produce breastmilk if I haven’t had a baby?

No, eating lactation cookies won’t make anyone’s breasts spontaneously productive, so there’s no need to worry about sharing these with your friends, family or co-workers and giving them leaky nips.

Can I make vegan lactation cookies?

This recipe is vegetarian, but with a couple of simple swaps it could be made vegan.

To replace the egg, simply add 7 tablespoons of tepid water to your flax seeds and leave for around 5 minutes to make an egg replacer. As a substitute for the butter, simply exchange with the margarine/vegan spread of your choice. Additionally, you’ll want to double-check your chocolate chips are dairy-free.

The only difference in the method is that you will need to use a non-stick cooking surface as it they will want to stick to the tray. A silicone baking sheet works a treat. My first attempt at veganising these resulted in cookies with “added fibre” in the form of greaseproof paper stuck to their bottoms…

Without further chit-chat, here is my recipe for oatmeal chocolate chip lactation cookies!

a lactation cookie held in the air in front of a rustic brick wall

Oatmeal Chocolate Chip Lactation Cookies

Chewy, oaty, chocolatey cookies with bonus ingredients to promote breastmilk production.
Prep Time 20 minutes
Cook Time 12 minutes
Course Dessert, Snack
Cuisine American
Servings 20 cookies
Calories 176 kcal

Equipment

  • Baking sheet
  • Oven
  • Mixing bowls
  • Kitchen scales

Ingredients
  

Dry Ingredients

  • 240 g rolled oats
  • 210 g plain flour (use gluten-free if required)
  • 5 tbsp debittered, powdered brewer's yeast (can be omitted for regular cookies)
  • 3 tbsp ground flax seed
  • 350 g sugar (I use a blend of 100g demerara, 100g coconut sugar, 100g caster sugar and 50g dark brown sugar)
  • ½ tsp baking powder
  • ½ tsp bicarbonate of soda (also known as baking soda)
  • ½ tsp ground cinnamon
  • 250 g chocolate chips (I like to use half milk chocolate and half dark)
  • 1 pinch salt

Wet Ingredients

  • 1 medium egg
  • 1 egg yolk
  • 250 g unsalted butter
  • ½ tsp vanilla extract

Instructions
 

  • Preheat your oven to 170°C/350°F.
  • Measure out your dry ingredients (except the sugar) and add to a mixing bowl. Lightly whisk together until evenly dispersed.
  • Melt the butter in the microwave. Add the sugar and mix vigorously until the mixture is reasonably smooth. Add in the vanilla extract and stir through. Leave to cool slightly.
  • Lightly beat your egg and extra yolk before adding to the sugar and butter mixture.
  • Pour your wet mixture into the dry, stirring with a wooden spoon to combine. When the dough becomes too stiff to stir, work it with your hands. It should be a nice, pliable texture and not too sticky.
  • Take meatball-sized chunks of dough and roll in your hands, before flattening into cookie shapes. this mixture doesn't spread, so if you leave it in a ball it will make something more akin to chocolate chip rock cakes. You should get around 20 decent-sized cookies.
  • Bake in the oven for around 20 minutes, until the very edges are crisp. They will seem too soft, but will firm up considerably as they cool. Don't overbake or they will become hard and biscuity as opposed to chewy.
  • Leave to cool on the baking sheet until cool enough to touch, then transfer to a wire rack. Store in an airtight container for up to 4 days, or freeze.

Notes

You can use more or less any sugar, but my combination works best for me. Using all demerara will give you slightly crunchier cookies, all light brown sugar will be slightly softer, all caster sugar will have less dimension of flavour. I wouldn’t recommend using all dark brown sugar, or they will be quite treacly.
The dough can be frozen after stage 6 for ready-to-bake cookies, just give them an extra minute or two in the oven.
You can swap out the chocolate chips for other mix-ins, like nuts or dried fruit.
Keyword baking, beginner, chocolate, cookie, oatmeal, quick and easy
Continue Reading

Black Pepper and White Chocolate Madeleines

Working on a French food website is a bit hazardous, especially when it comes to the baked goods. It seems inevitable that I sometimes end up dribbling into my keyboard, imagining the treats I could whip up when I got home.

When I set about developing this recipe I must confess I struggled; how can you improve on the traditional flavours like vanilla, lemon and almond? The answer is not to dramatically alter, but to enhance. Thus, the black pepper madeleine was born.

The addition of black pepper to a sweet, delicate cake may seem like sacrilege, but a couple of twists of freshy-ground peppercorns elevates the airy sponge with an ever-so-slightly spicy je ne sais quoi and stops the vanilla from being humdrum. The white chocolate dip balances the kick and looks rather pretty.

Of course, you could always switch out the pepper for lemon zest and have a perfectly lovely, traditional madeleine, but I heartily recommend this little experiment. I promise it is less bonkers than it sounds.

Please note that dusty, grey, pre-ground pepper will not work here. Not only is the flavour too dull, it will tint your cakes an unappealing grey rather than a rich, sunny yellow.

This recipe is great for adventurous beginners, with minimal special equipment required. You can buy madeleine tins fairly inexpensively online. You can find silicone ones but, personally, I find that the good old-fashioned non-stick metal kind heat up more evenly and give a much nicer colour and texture.

Black Pepper and White Chocolate Madeleines

Elena Bjørn
The classic scallop-shaped, buttery French cakes with a modern twist of black pepper.
Prep Time 1 hour 30 minutes
Cook Time 12 minutes
Total Time 1 hour 12 minutes
Course Dessert
Cuisine French
Servings 18 madeleines
Calories 138 kcal

Equipment

  • Madeleine tray
  • Oven
  • Hand mixer

Ingredients
  

  • 2 medium eggs (as fresh as you can manage)
  • 110 g unsalted butter
  • 95 g caster sugar
  • 110 g plain flour
  • 1/2 tsp baking powder
  • 2-3 grinds freshly cracked black pepper
  • 1/2 tsp vanilla paste (or a few drops of extract)
  • 150 g white chocolate
  • 1 pinch salt

Instructions
 

  • Grease your madeleine tray with a scant amount of unsalted butter. Too much will result in crusty cakes. Place the tray in the fridge while you prepare your batter.
  • Melt your butter in the microwave, or on the hob using a double-boiler, and set aside to cool slightly while you measure your other ingredients.
  • If your eggs are not room-temperature, submerge them briefly in slightly warm water. If your eggs are too chilly they will not achieve the volume required. Using a stand mixer, hand mixer or even a whisk if you’re brave, beat the eggs and sugar together until they are very pale and have reached the “ribbon stage”. This will take around five minutes with an electric mixer. At the very end, add in the vanilla and pepper.
  • Sift together your flour, baking powder and salt, before folding gently into the egg mixture. Use a metal spoon or rubber spatula, knocking as little air as possible out of the eggs. Stir until the flour is just incorporated.
  • Add a couple of spoonfuls of the egg, sugar and flour mixture into your cooled, but still melted, butter, and stir until mostly-combined. This will make it easier to add the butter to the rest of your mixture and fold until the batter is smooth and silky.
  • Cover the bowl with cling film and refrigerate for a minimum of one hour, up to overnight. This chilling time is crucial for developing a light, fluffy sponge, preventing crusting and growing a sizeable “hump” on the underside of your madeleines.
  • Once the batter is thoroughly chilled pre-heat your oven to 175C (170C fan). Retrieve your batter and the tin from the fridge and portion out your cakes. You should have enough batter for 18 standard-sized madeleines or 12 extremely generous ones. The batter will be very stiff, but do not be tempted to smush it about in the tin; it will self-level in the oven and spill neatly into the characteristic ridges.
  • Bake for 9-12 minutes, depending on your oven. I am guilty of sitting on the oven floor and babysitting my madeleines as they cook, biting my nails as I wait for the batter to bulge into the all-important hump, or belly, which means the batch has succeeded. As soon as the cakes are golden and springy to the touch they are ready to pull out of the oven.
  • Allow your cakes to cool in the tin for a short while before moving them to a cooling rack, scalloped-side down. While they finish cooling you can melt your white chocolate (if nothing else, to prevent you from snaffling any of the still-warm madeleines. They will smell delicious, and you will want to eat at least four before you’ve finished them off.) You can use a double-boiler on the hob or the microwave on low-power.
  • Once your chocolate is melted you can choose to drizzle your madeleines for a fun, informal look, but I like to dip mine, like langues des chats. For this, you’ll find a narrow container will give you straighter lines and a deeper well of chocolate to dip into. A pyrex measuring jug is ideal.
  • Set your chocolate-dipped madeleines hump-side-down on the cooling rack while the chocolate hardens. Once set, eat right away. Freshly-baked madeleines do not keep well, especially if they are on the smaller side. If you really must keep them overnight, store them in an airtight container in the fridge and allow them to come back to room temperature before eating.

Notes

The addition of baking powder is considered slightly controversial by purists and can be omitted if you’re aiming to make a strictly traditional madeleine. However, if you’re not confident about the airiness of your eggs or the gentleness of your folding technique, the baking powder will yield a more reliable result.
Keyword baking, beginner, cake, french, madeleines, patisserie
Continue Reading